
The
show season is over for me, and I have been allowing myself time to play.
It is the time of year to make gifts, and to have some fun in the studio,
before deadlines begin to roll in again.
I have even been making some mixed media pieces, like Snow Moon, below

I also
turn 40 next week. I am not however dreading it, I feel pretty good and I
am totally young at heart still.
see? purple hair to prove it

My best friend (since the first day of
9th grade) is taking me to NYC for an overnight Friday so we can celebrate our
40th together (her birthday was a couple weeks ago). You see, she used to
go to NYU, so us gallivanting in the city was pretty frequent in our younger
years. And though I am REALLY a country girl at heart, something about
New York City just speaks to me. I think its the fact that there is
art everywhere, and a plethora of unique people. I love the street
performers, the little SOHO galleries, the fancy smanchy shops with
little dogs that sit in their mahogany beds. I love just soaking
it all in.
Here is an old pic from our early NYC days. Oh, to be young in the 90's again

that was too funny not to post
What
does this have to do with prong settings? LOL! Well, I really
needed to make myself some new jewelry for our trip! I usually make
myself something special for my birthday each year, and this year, I wanted to
make some cool chunky silver necklace with fossils and odd gemstones and
such.
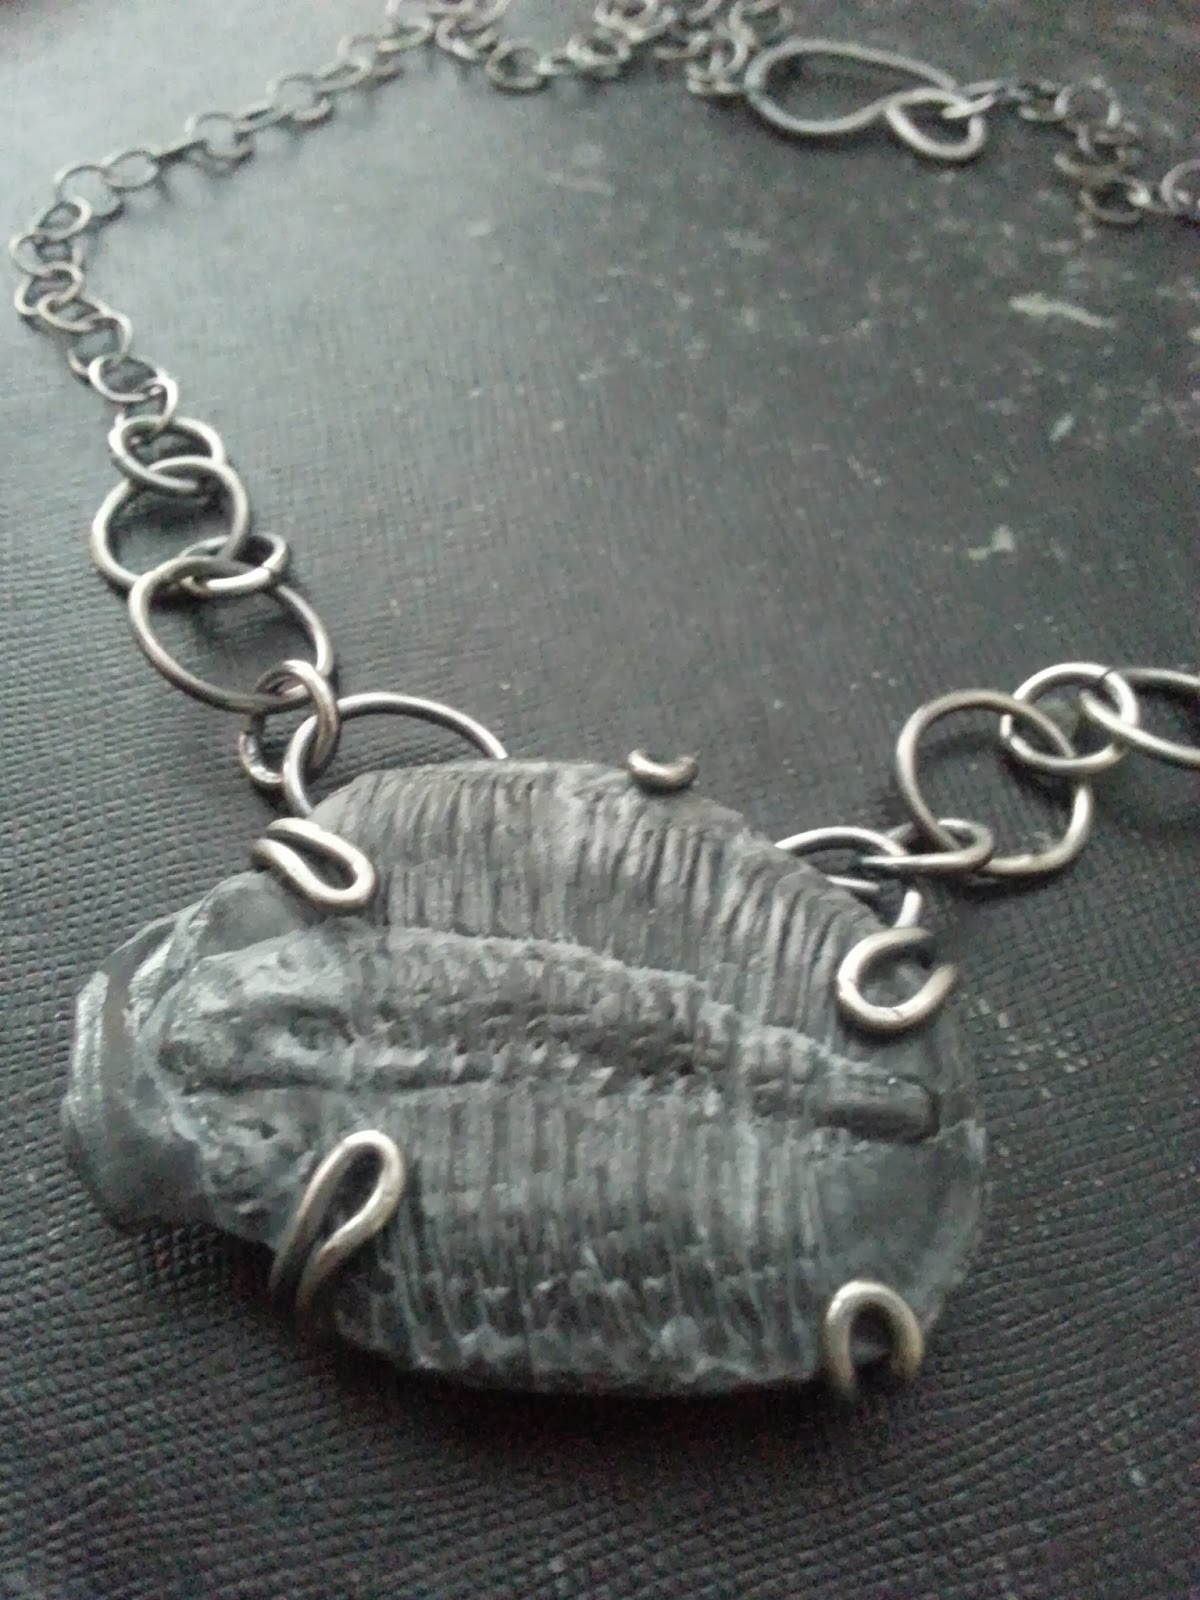
I
started with this horse tooth fossil.

I loved the shape of it, but it was
chunky. I thought about bezeling it but it would hide too much of
the fossil for my liking. Plus, it would use sheet metal,
which costs more then wire.
So I
set out to do a prong setting. A basic prong setting is usually a
circle on wire, with the prongs soldered onto it. You set your piece in
it, and tighten the prongs. However to make an odd sized shape piece work, it helps to go free form.
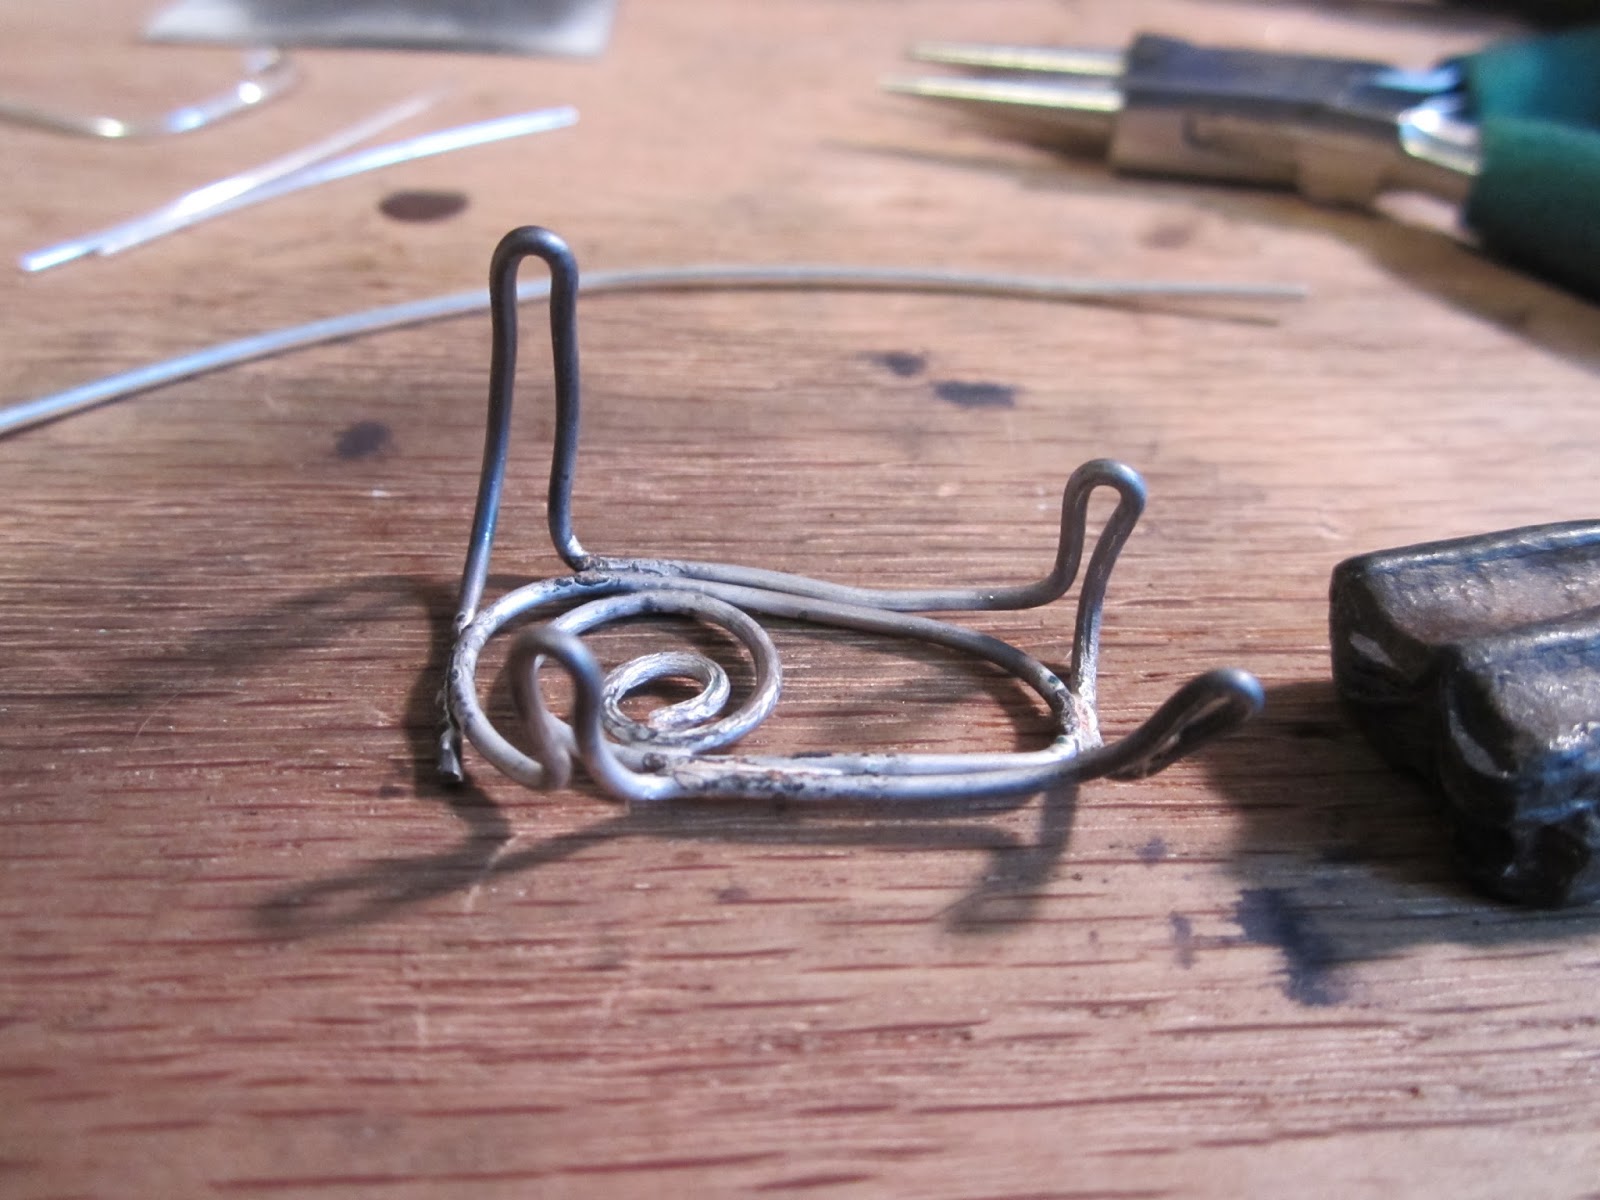
So I
just started free-forming the wire, and soldering as needed as I went
along. I'd make my basic shape, and then lay my piece on it, see where
the next prong needs to be, flip it over, make the prong, use a mallet to
flatten it, tighten the pieces together, solder, pickle, make another prong,
ect. I even had to drill the horse tooth and feed a ball pin through it to make it hold well.

I think you really need to be willing to go with the flow- and allow mistakes to turn into solutions with this freeform process. There is really no set way to do one.
Here is one I made for a crystal, I'd hold it up to the stone, see where another prong needed to go, and continue

Here is the finished piece ready to have the crystal set into it

finished piece back

finished piece front

These two pieces were thick, and they also posed the problem that I didn't want to attach the chain from the back, so I had to attach a piece to the top of the prongs, so the chain would attach in the middle of the thickness of the piece. Tricky. very tricky. I only use a butane torch and solder paste. This has been a great test of my skills, and helped me to get even more comfortable with the flame, and where my heat is- or isn't.
Then I
tried some thinner stones and cabs, and they were much easier to make a setting
for. (I always seem to try the hardest first).Each one used only one piece of wire for the backing and prongs, it just
took some fancy wire work.


Then
they either got rings soldered on or fastened in the prongs themselves so that
I could add my chunky chain.


Prong
setting is actually pretty difficult when you have a fragile item. You
really need to get it perfectly tight, without breaking your piece. I
used 16 gauge wire for mine, so they are really firm, but also a bit hard to
set. You also need to make sure that your prongs are each set in a place
that will secure your cab or stone. Usually one on each side is what you
need, but sometimes you can get away with less if they stone is irregular, and
you place them just right.


I
encourage you to try it though, because it makes the backside as pretty as the
front! It will test your wire work skills, your soldering skills, and you
may even pull out some geometry and math you didn't think you'd ever need
again!
So I have a couple new pieces for myself to wear to NYC. I will try to take pics and have an awesome blog post next week about all our adventures.
I will be adding some of these to the galleries and my etsy shop after the holidays. So be on the lookout for them!
I think I like the backs better than the fronts :)
ReplyDeleteI like the back too, you can really wear them either way.
Deleteum...WOW! That is amazing! It suits your style so very well. I would NEVER have thought of doing that in a million years. Wonderful. And I have purple in my hair as well (although just peeking out, it has been interesting to see people staring at the top of my head, like when I was handing out the communion at church the other day!). Happy 40th! Have fun! I wanted to go to NYC for mine, but ended up in San Fran instead. Welcome to the over 40 club - the most fabulous decade yet! Enjoy the day. Erin
ReplyDeleteThanks Erin! GO PURPLE! I love my purple. and yes, I get looks, but I really don't care. I think it suits me. I haven't been my actual hair color in a long time, I have dyed it every color under the sun since college. I get bored easily. spent too long being a boring brunette! (and I make an awful blonde). done every shade of red too. I am just trying to embrace life and let myself be who I am- finally.
Delete